Tom Mchale gives the reader a detailed look at how to build your own AR-15 rifle, featuring an Aero Precision AR builder kit and a downloadable list of tools and parts. Also, AmmoLand is giving this gun away, register here.

USA –-(Ammoland.com)- Hey, here’s an idea. Let’s build a super spiffy AR-15 rifle! Better yet, let’s build an AR rifle and then give it away to one of AmmoLand daily digest email readers!
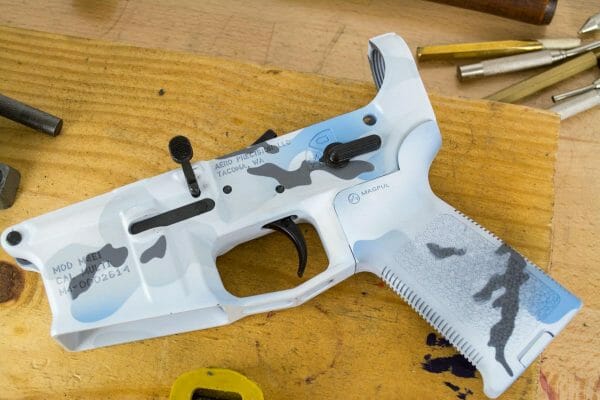
Thanks to Ammoland, Aero Precision, and Brownells, the super cool Aero Precision Arctic Camo AR-15 Rifle we’re going to build before your very eyes can be yours. Stay tuned for more info on how to win it.
So what’s this rifle all about? We started with the Aero Precision M4E1 Enhanced Arctic Camo Builder Set. [Note this arctic camo pattern is only available for a short few months, but the build instruction below would work with any of the Builder Sets Aero offers through out the year.]
These kits are hand finished by Blown Deadline, and they look, well, epic. The standard kit only includes the lower receiver, upper receiver, and handguard, but the Aero folks have an option to buy a Magpul CTR Stock, Magpul MOE Grip, and Magpul PMAG 30-round Magazine – all finished in matching Arctic Camo.
We’re going to cover all the parts used in this rifle kit build in our complementary feature, “Aero Precision Dream AR-15 Rifle Project – Picking Parts & Components“. In this article, we’ll focus on how you can build the same AR-15 rifle and show you how we put it all together, including the gun smithing tools we used to make the complete AR15 rifle kit build go smooth.
Tools You’ll Need For Any Rifle Build
While you can build your own AR-15 rifle kit on the cheap with fewer tools, having the right ones makes the job a lot easier / fun. More importantly when you have a sweet custom finished rifle like this one, using the right tools reduces the odds of unsightly scrapes, scratches, and dings. You can buy all of these at Brownells and have them in your workshop in a couple of days.

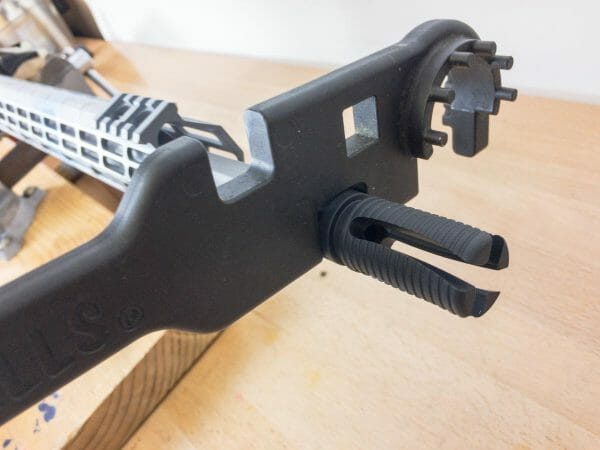
Get a Brownells AR Armorer’s Wrench. You’ll use this forever, and it has many purposes including installing the receiver extension, barrel nut, muzzle devices, and attaching torque wrenches.
- A Nylon and Brass Hammer has lots of uses for driving pins and settling parts into place. The brass side provides some oomph when needed while the nylon end won’t damage the finish.
- A Gunsmith’s Alignment Pins Tool Set Get the set as you will use all of them. The alignment tool is used for keeping trigger parts in place while you drive in mounting pins.
- One way to prevent marring up nice parts is to use the right tools.The Brownells Extra-Large Bench Block allows you to drive pins in and out of parts without scratching.
- A lower AR-15/M16 Action Block & Lower Vise Block Set allows you to mount the rifle by the magazine well so you can work on the lower or whole rifle securely. It’s like an extra pair of hands and is a great help for cleaning too. This kit has an upper receiver mount also, so you can hold that in place while installing gas systems, handguards and muzzle devices.
- A Roll Pin Punch Set, these are made explicitly for those hollow pins that attach the gas tube to the gas block and the bolt release to the lower receiver. These punch tools won’t crush those hollow-center roll pins.
- A General Purpose Torque Wrench connects to your armorer’s wrench and allows you to tighten the barrel nut and receiver extension tube nut with the proper amount of torque.
You’ll want to stake the receiver extension nut in place so it can’t come loose. A 5/32″ Center Punch like this will do the job.
There are other nifty tools available, but you can get the job done with this basic set of gunsmith tools. Lets get to the gun building.
Build Your Own Ar-15 Upper Receiver
Install the AR barrel and barrel nut
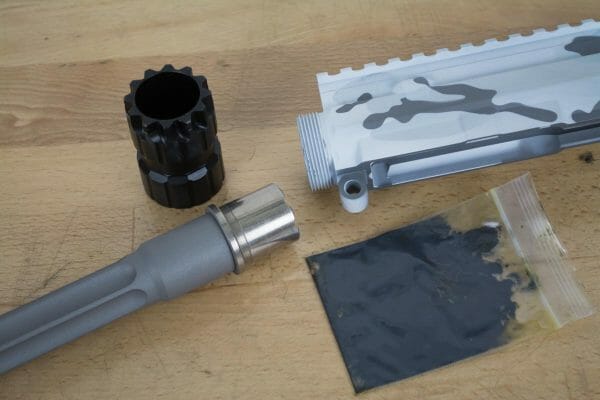
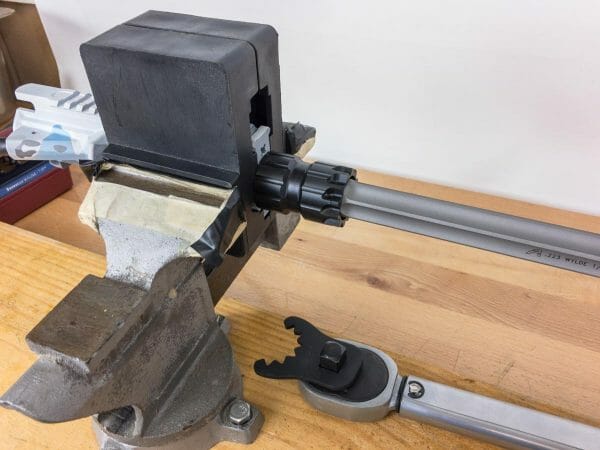
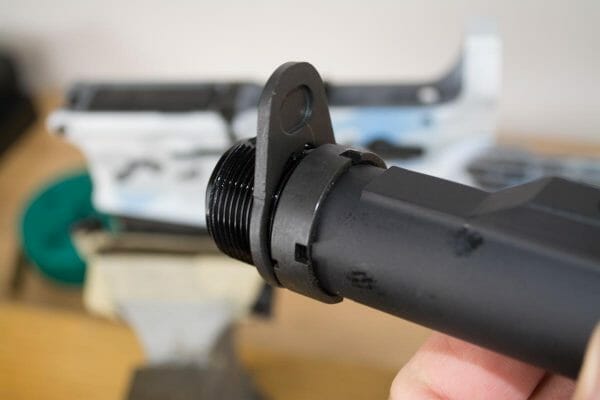
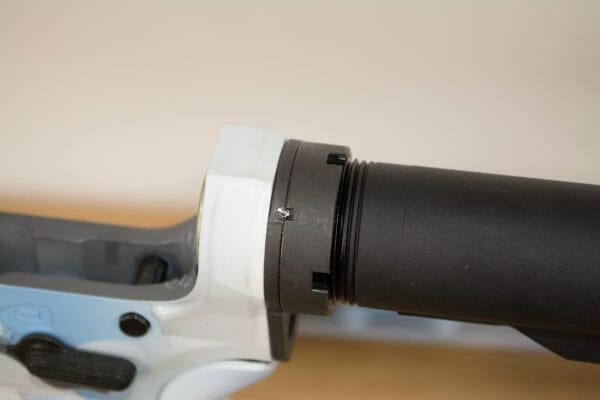
For this AR15 rifle build we used an Aero Precision 18″ .223 Wylde Fluted Stainless Steel Barrel . Aero Precision includes a custom barrel nut wrench. Well, it’s more of a flat that sticks on the end of a torque wrench – you can’t use it on its own. (check the image below) But it does perfectly fit the fancy barrel nut to which the handguard mounts. Factory specs call for tightening the barrel nut to a torque of between 35 and 60 foot-pounds so, after coating the receiver threads with some Loctite Silver Grade Anti-Seize Stick Compound, I used my torque wrench to tighten this to 50 foot-pounds.
Remember to make sure the nut is properly aligned with the gas tube hole so the tube can enter the upper receiver unimpaired.
Install the AR15 Rifle Gas Block

This barrel is cut for a .750-inch gas block, and it slipped into place perfectly. First, I pinned the Brownells Black Nitride Gas Tube into the Midwest Industries Low Profile Gas Block, then positioned it on the barrel taking care to make sure that it was entirely vertical. This block clamps down with three hex screws and the block includes red Loctite to make sure everything locks in place securely. At this point, we’ve got the barrel, barrel nut, gas block, and gas tube installed, so it’s time to mount the handguard.

Install the Rifle Handguard
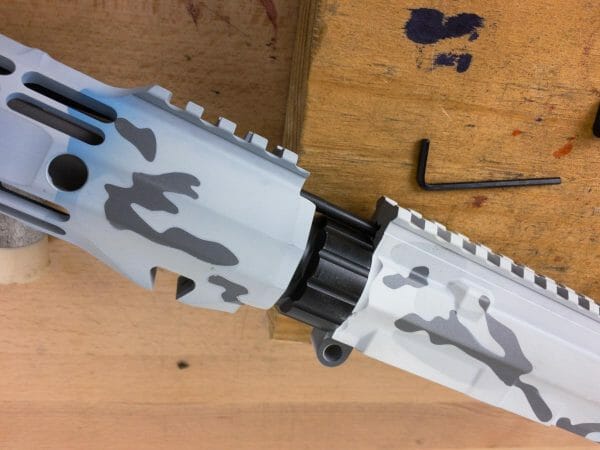
The Aero Precision Gen 2 Enhanced Handguard has a nifty mounting system. A counter-threaded bolt draws two braces towards the center of the handguard where it mounts to the barrel nut. Read the instructions carefully, and you’ll correctly center this bracket on the first try. An included hex wrench is all you need.

Install the Rifle Flash Hider
I’ve always been partial to the tried and true Smith Enterprise Ar-15 Vortex G6-A3 Flash Eliminator and that’s what we chose for this AR rifle build. Since this flash hider has no required orientation, you don’t necessarily need a 1/2″ Crush Washer to give you perfect alignment as you do with a standard A2-type hider, but I used one anyway. The reverse pressure helps keep the flash hider mounted securely on the threads. I did use a couple of drops of Red Loctite Thread Locker as well. If you win and this rifle ends up at your place, then you want to change the muzzle device, gently heat it to release the Loctite before trying to remove.
Voila! Now we’ve got a completed AR15’s upper receiver, and it looks great. It’s time to build out the AR lower.

Building the AR Rifle Lower Receiver
You’ll need a Lower Receiver AR15 Parts Kit with latches, pins, and springs. We got one without a trigger group because Brownells provided a Geissele AR trigger set.

Magazine Catch Installation
We get to start with an easy one. Technically, no tools are required although the Brownells vise block for the lower receiver makes most of the remaining steps much more manageable. It’s like an extra pair of hands to hold your lower receiver securely while you do important fiddly stuff with the parts.

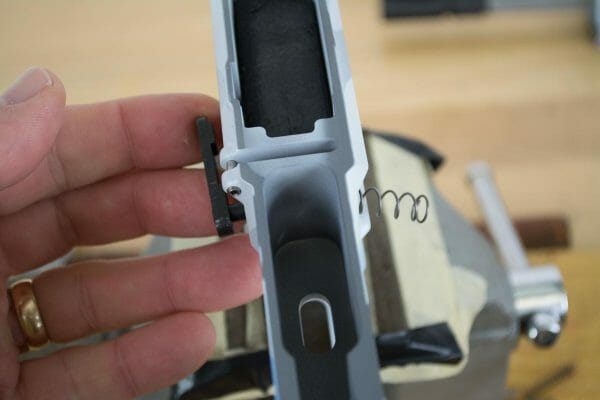
Insert the magazine catch into the left side of the receiver. From the right, place the magazine catch spring followed by the magazine release button. If you push the button in from the right, the magazine catch itself will extend out the left side of the receiver. Rotate the catch, so it tightens down on the magazine button threads. When the two pieces are flush, test it out. That’s it.
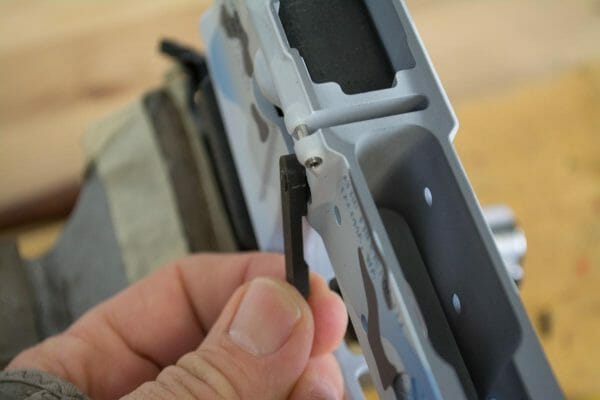
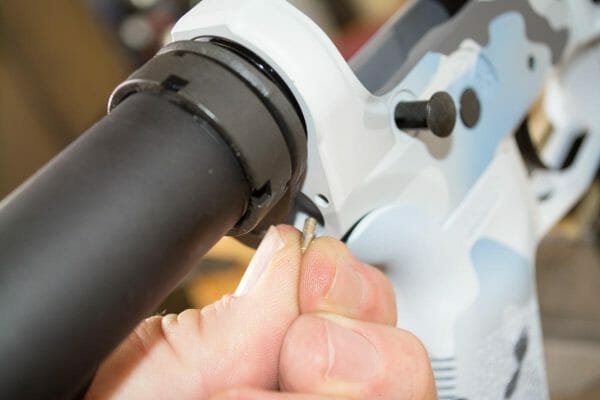
Bolt Catch Installation
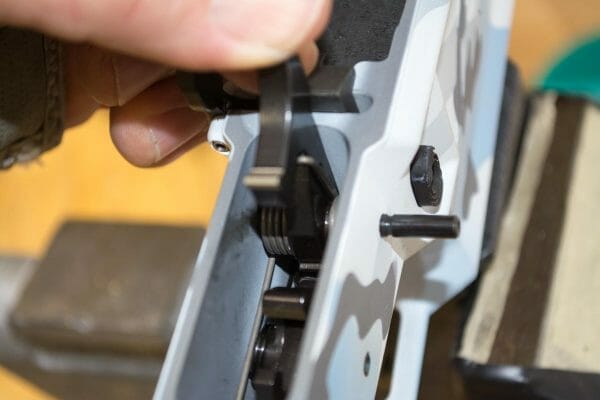
The lower parts kit includes a spring and plunger that go into the receiver. Install these, compress them, and hold the bolt catch and release lever in place. Most kits use a roll pin to hold this part and pressing or driving the pin is is where many folks scratch their rifle build, but the Aero lower receiver uses a small pin that operates as a hex screw, eliminating the danger of scratching or worse, breaking your lower..

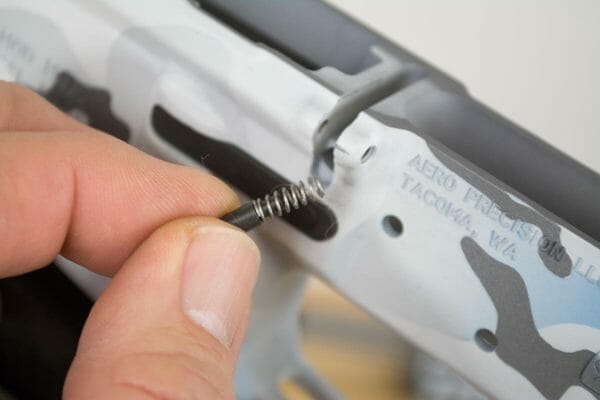
Pivot Pin Installation
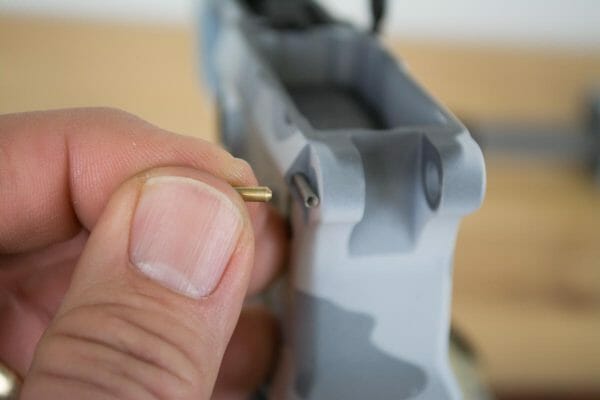
This one takes a bit of patience because the parts are small and under spring pressure. If you’re going to do more than one rifle, you might want to invest in a Brownells AR-15 Pivot Pin Detent Installation Tool. I did it the hard way without too much grief. Install the detent spring into the receiver followed by the small detent pin. Using a punch, compress that into the receiver while installing the pivot pin. Be careful not to let the spring and detent pin fly because they’re small and get lost easily. The pivot pin has a flat side and interior channel that captures the detent pin so once installed; the pivot pin won’t come entirely out of the receiver.

Trigger Group Assembly
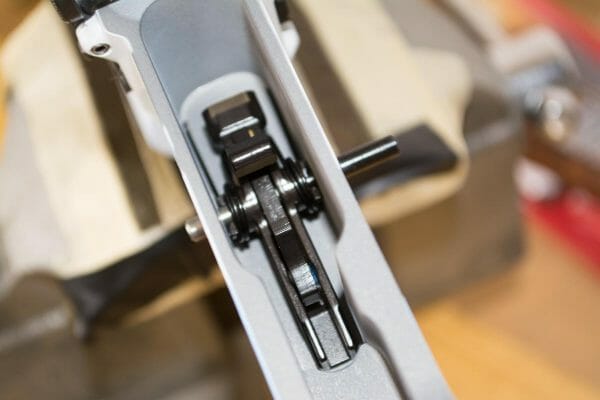
Depending on the trigger system you choose, instructions may vary. The Geissele SSA Trigger we chose for this rifle installs like a standard AR-15 trigger group. The trigger goes in first, and you can use the alignment punch to hold the trigger and its spring in alignment with the holes in the receiver. Install the trigger pin while driving out the alignment punch. In this case, the Geissele kit included a slave pin that held the parts together while I installed the permanent trigger pin. Once that’s in place, you can remove the hammer pin, install a bit of lubricant in the hole, then place the hammer and spring in the receiver, taking care to rest the hammer spring legs on top of the trigger pin. The closed loop of the hammer spring should be behind the hammer body itself.
Safety Selector and Pistol Grip Installation

These parts go into place together because the detent pin and spring that moderate the safety lever operation are held in place by the pistol grip. Turn the receiver upside down in the vise block tool and install the safety lever through the receiver and rotate it to the “safe” position.

Now, drop the safety detent pin into the receiver hole.

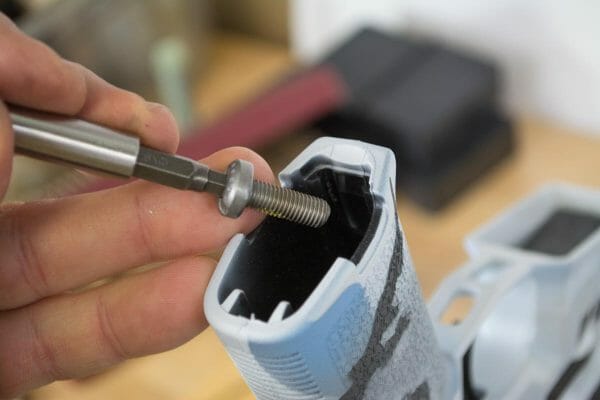
Place the safety detent spring into the pistol grip and position the pistol grip on the receiver taking care not to bend or kink the detent spring. Compress the pistol grip into position and insert and tighten the grip screw into the receiver.
Build Your Own AR-15 Rifle : Test Safety & Trigger Operation
Now you can test the trigger and safety operation. Put your thumb in front of the hammer, so it doesn’t slam against the receiver. With the safety lever on “safe” and the hammer cocked, press the trigger – hard. The hammer should not fall. Now, flip off the safety and press the trigger, catching the hammer with your thumb. It should fall. Finally, after recocking the hammer, press the trigger again, but hold it back. While continuing to hold the trigger to the rear, cock the hammer manually and then allow the trigger to move forward. You should hear and feel the trigger reset.
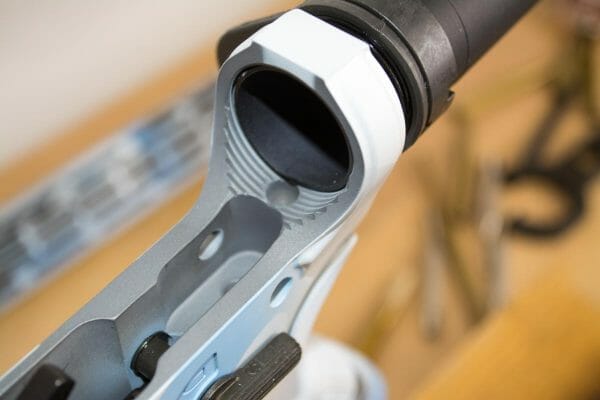
Install the Receiver Extension Tube
We chose the Brownells Mil-Spec Buffer Tube Assembly, so everything we needed was included. Thread the receiver extension nut onto the receiver extension tube with the open slots facing the rear of the tube. Next, place the receiver end plate over the threaded end of the receiver extension with the dimple facing forward. That will lock into the back of the receiver itself. Thread the tube into the lower receiver until the front of the tube almost starts to cover the buffer assembly spring and detent pin hole in the receiver.
Now drop in the buffer retainer detent spring, covered by the retainer. Compress the retainer and spring and screw the tube in until it holds the retainer in place.

Now you can install the rear takedown pin. The detent spring and pin that hold it in place are secured by the receiver end cap. Insert the takedown pin detent pin into the small hole in the rear of the receiver followed by its spring. Be sure that the groove in the takedown pin faces to the rear so the detent pin will fit into it.
The receiver end plate will hold the spring and pin in place. Carefully press the receiver end plate into position while tightening the receiver extension tube nut by hand. When all is secure, you can tighten the receiver extension nut using the armorer’s tool and torque wrench. The proper torque is usually 40 inch-pounds but check your instructions.
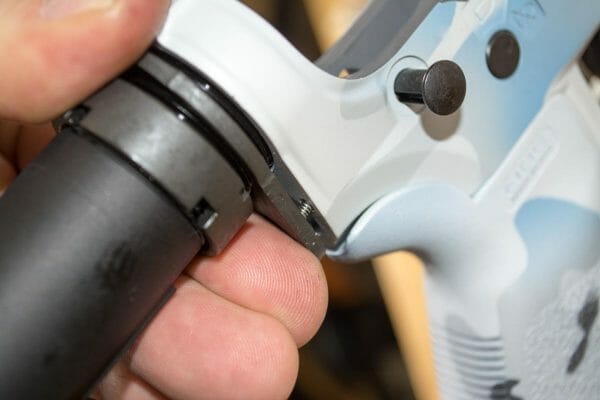
Last but not least, you’ll want to stake the receiver extension tube nut in place. Using the center punch and a small hammer, dimple and move some metal from the end plate into the front-facing notches on the receiver extension tube nut. That will prevent the nut from turning.
Now that the tube is installed, you can insert the buffer spring and buffer. The retention pin will hold the buffer and spring in place.

Now we have a completed lower receiver, and you’re ready to mate the upper and lower receivers.
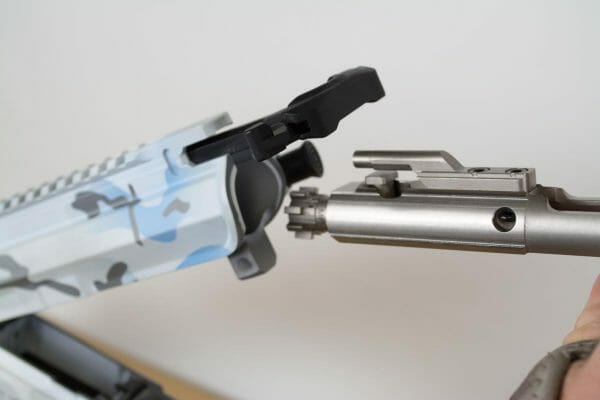
Once you have inserted the Brownells Nickel Boron Bolt and Carrier Group and BCM Gunfighter Ambi Charging Handle you can attach the upper and lower receiver with the forward hinge pin first. With the upper receiver open, place the charging handle in the upper receiver and slide the bolt into place. Push the bolt forward into the upper receiver and secure the receivers with the rear takedown pin. Now that you have built your own AR-15 should now have a working rifle that’s ready for optics installation.

We installed a Vortex Strike Eagle 1-6×24 Optic using the Warne X-Skel Scope Mount. To do this right, you’ll want a small torque wrench like the Nightforce Scope Ring Torque Wrench so you can tighten the scope rings properly. This Warne system calls for 25-inch-pounds of torque. This rifle is ready for range testing, so stay tuned, and we’ll cover that in the next story.


About
Tom McHale is the author of the Practical Guides book series that guides new and experienced shooters alike in a fun, approachable, and practical way. His books are available in print and eBook format on Amazon. You can also find him on Facebook, Twitter, Instagram, and Pinterest.
[optin-monster-shortcode id="wec25cwk1wzofplr"]
Keep a small flat refrigerator magnet and tweezers on work bench/table to manage springs and small pins. Trays are nice, but springs always manage to pop out of bins at worst possible time.
BillyBob, the lower receiver is the serialized “firearm”. You would have to get that through an FFL assuming its completely finished. Now, if you choose to get an %80 finished lower receiver (a lower that has not had the holes drilled and trigger well machined out) you can buy that without an FFL. In that case, you are just buying a shaped block of metal, for legal purposes. When you mill out the remaining pieces to finish the lower, its still legal, because you are now homebuilding your own firearm. It has always been legal to home build your own… Read more »
So…..where does any specific part and the FFL come into play? Surely we cannot ‘buy a kit to build an unregistered AR”….can we? Not that I am worried about THAT, just haven’t seen anything about registering anything with the Feds…?
Where can I buy an AR15 kit? I’m in Calif.
My dad used to drill out barrels during WWII, and built rifles at home on the side.
I’ve been wanting to learn how to do this for some time! Now I can! That’s excellent!
Good Article and explanation of tools involved.
Arctic cammo ? Won’t work if FL especially SW FL.
So, now how do I register for the Free Rifle when that section turns off when I try to access it?
I think you want this page : Aero Precision Arctic Camo AR-15 Rifle Giveaway
Looks like what I would love to have and shoot for my first AR 15 ever and definitely a keeper.