
U.S.A. –-(Ammoland.com)– The Howard Leight Impact Sport electronic ear protection is certainly among the most commonly used ear-pro you’ll find at the shooting ranges of America today. I’ve used various versions of the Leights for more than a decade, and am more than familiar with its features and shortfalls (review here). Being popular and common in use is great, but that doesn’t mean there isn’t room for growth. Behold, two simple ways you can DIY improve your Howard Leight Impact Sport headsets. One is nearly free, and the other is a lot cheaper than a hearing aid.
Before we can dive in to improvements, lets identify the shortcomings that lead the Impact Sports to a middle-of-the-pack 22 dB Noise Reduction Rating (NRR).
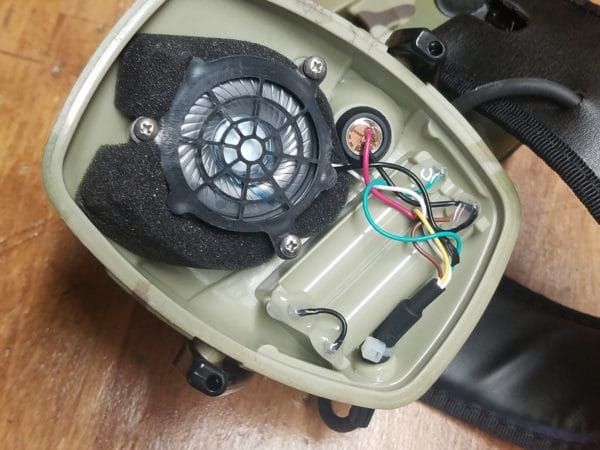
- The earcups. The stock earcups are a little bit of what feels like vinyl, filled with the least dense foam imaginable. Each cup weight 9 grams, and does little to stop sound. The OEM cups also deteriorate quickly, causing them to stiffen up. Once that happens, it’s very easy to “break the seal” around your ear, and let in a full-volume blast of noise. Honeywell (Howard Leight parent company) recommends replacing the cups every 6 months, at around $15-$20 a year for upkeep.
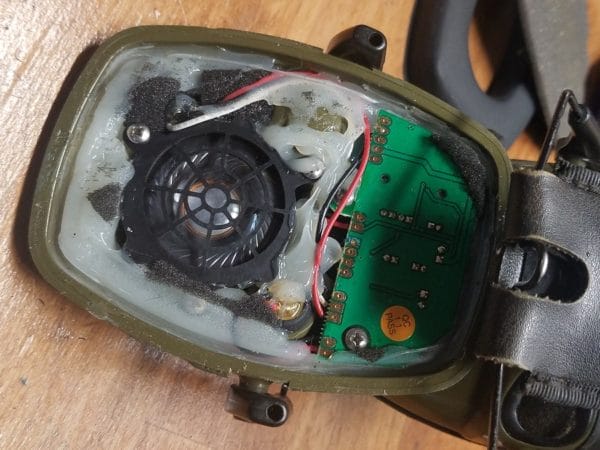
- Dead space. If you pop open the ear cups (as I do below), you’ll see a lot of empty space. Open space like that does nothing to stop noise from blowing right through. We need to fill that up to improve the sound absorption!
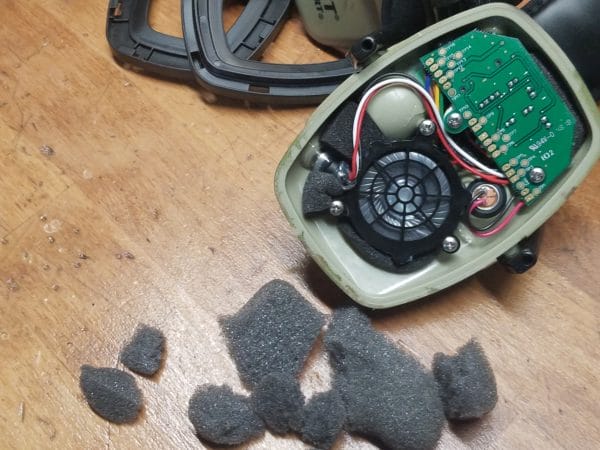
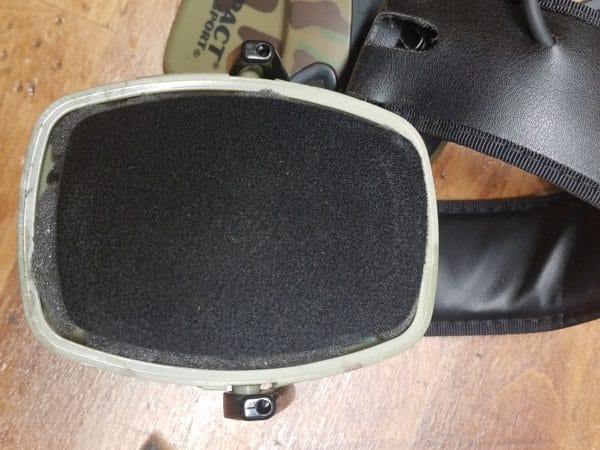
So let’s disassemble our ear pro. First, grab the original foam ear cups and give them a pull. They’re held in with a few retaining tabs, and pop out easily.
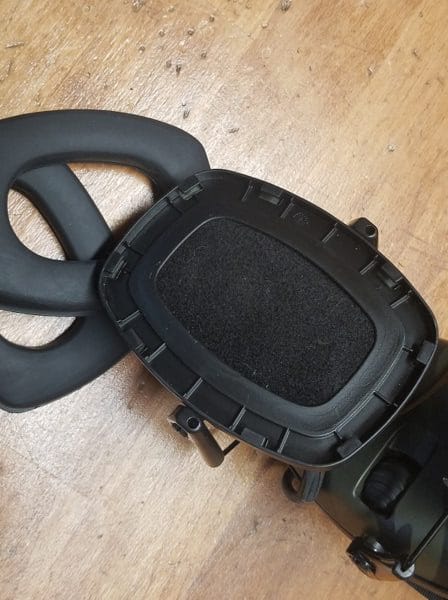
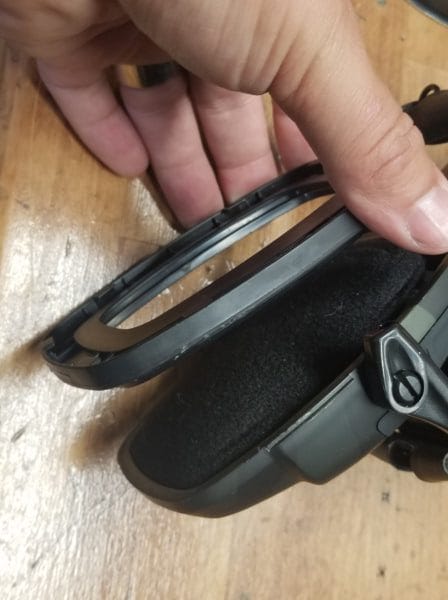
Next, use a flathead screwdriver to pop off the plastic rim that held in the ear cups. Once off, set those (and the small foam sheet underneath) to the side.
Now you can see into the belly of the beast. The left side (as worn), which has the volume adjustment knob, has a bit more material inside, as it contains the circuit board and internal section of the volume knob. Don’t let looks deceive you though, there’s a lot more space than it seems at first glance.
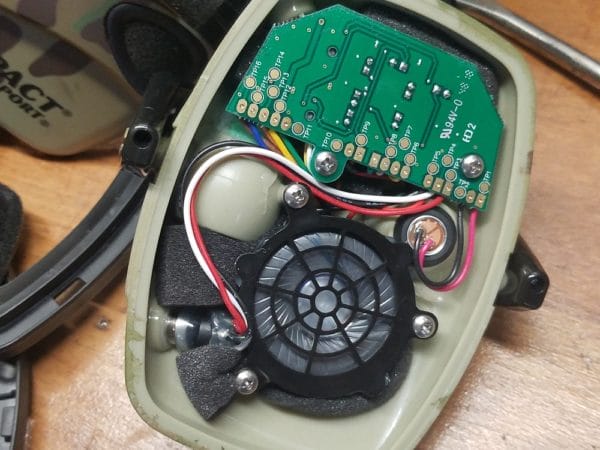
So now we’re at the spot where we can make a big difference, for very little money. We need to fill up all that empty space! On this headset I used foam from an old, unused gun case. I used my screwdriver to (carefully!) squeeze as much extra foam into the case as I could.
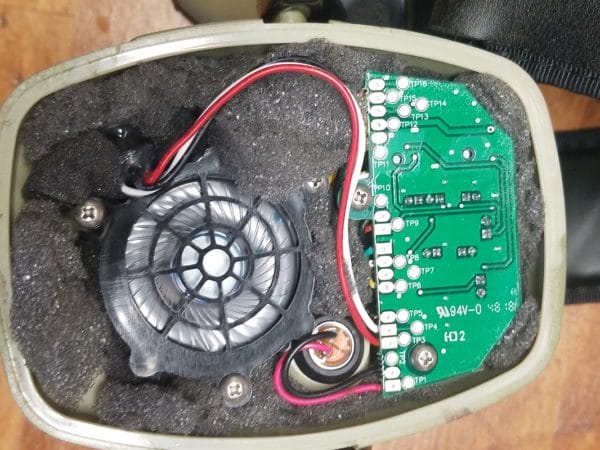
It’s OK if some of the foam is a little loose, or if it sticks out slightly above the lip of the case. When we reassemble, the foam sheet that goes under the ear cup retaining ring will hold everything in. I’ll take a moment to mention foam isn’t the only thing you can use to fill the empty space in the case. I’ve also used silicon caulking and liquid electrical tape in conjunction with foam for good effect. I put up a video showing this process years ago. The silicone worked well, though it’s not much better (if at all) than foam, and much more permanent.
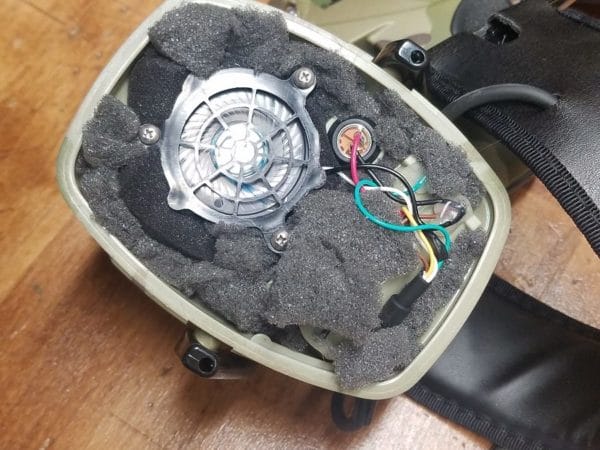
Let’s reassemble! Lay your foam sheet back on.
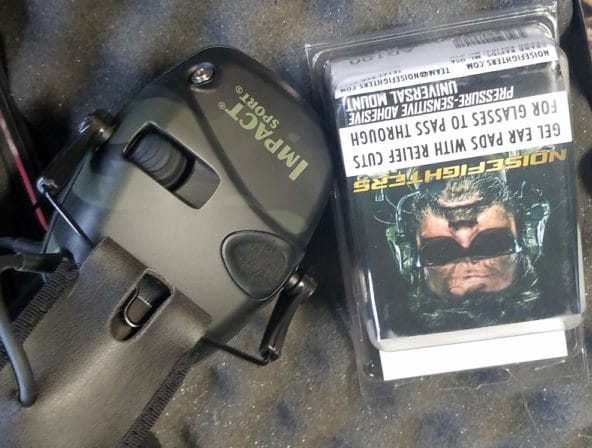
Now let’s pause. We’re not putting the stock ear cups back on, instead we’re using Sightlines gel cups from Noisefighters. The Sightlines improves the effectiveness of ear pro such as the Howard Leights in a few ways.
- They’re more comfortable. This is especially true with eye protection on, as the Sightlines have channels cut out for the ear bridge of your glasses. No more temple-pressure induced headaches while shooting!
- They seal better. Being gel rather than vinyl/foam, the Sightlines cups contour to your head and maintain the ear seal. If you’ve had the ear seal unexpectedly give out while someone is firing off a rifle with a massive muzzle break next to you, you’ll immediately see the benefit here.
- They reduce ambient noise passing into your ear. Simply put, there’s more material that sound has to pass through to get to your ear canal. I have an old set of Gen 1 Sightlines, they weight in at 33 grams, versus 9 grams for the OEM’s. That’s a 366% increase in material!
- They’re cheaper than maintaining the OEM cups as recommended. Honeywell wants you to spend $15-$20 a year. The Sightlines last much longer, and run $40. My Gen 1 Sightlines are over a year and a half old, and still look just like the brand new Gen 2’s despite regular use.
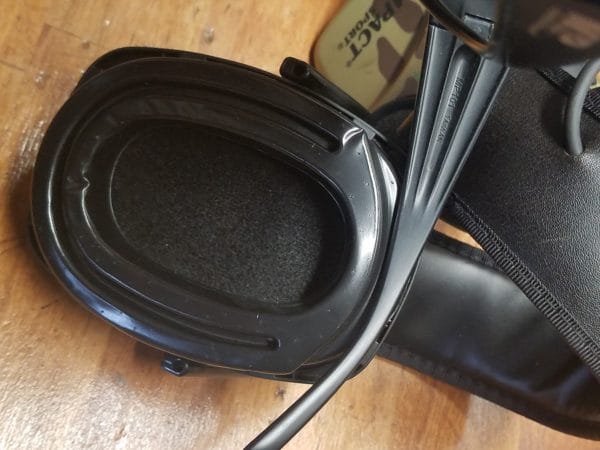
OK, let’s get back to reassembly. While the Gen 1 Noisefighters Sightlines gel cups simply snapped back into the retaining tabs, the Gen 2 Sightlines have a pressure sensitive, non-permanent adhesive. Peel the backing sheet off, then carefully align and press in the gel cups. Once they’re in, give them a firm press to make sure the adhesive is all the way in.

That’s it! Your DIY improvements are done. Even comparing performance at low levels of sound (same Megadeth song, same volume, same distance) the improved Howard Leight Impact Sport headset shows a noticeable sound reduction with the electronics off against the unimproved set. That improvement is greatly exacerbated at louder volumes, such as at the shooting range. Given that the difference is easily apparent to the naked ear means that we’ve improved our headsets by at least 1 decibel. Since decibels are logarithmic, not linear, the jump from 22 dB NRR to 23 (or greater) dB NRR is a significant reduction in sound pressure slamming into your eardrum.
As someone who’s dealt with significant hearing loss since my early twenties, take it from me: good ear protection is always worth the money. Get the best set you can, whether by buying it or improving a good set into a great one. There are more ways to improve ear pro than the ones I’ve listed, if you have a cool technique post it in the comments below so all shooters have the chance to benefit!
About Rex Nanorum
Rex Nanorum is an Alaskan Expatriate living in Oregon with his wife and kids. Growing up on commercial fishing vessels, he found his next adventure with the 2nd Bn, 75th Ranger Regt. After 5 tours to Afghanistan and Iraq, he adventured about the west coast becoming a commercial fisheries and salvage SCUBA diver, rated helicopter pilot instructor (CFII) and personal trainer, before becoming a gear reviewer and writer.”


I have serious hearing loss from my military career. I have Gen-1 Noisefighters on my Howard Leights. They were $40 and they are very comfortable. But they are easily knocked off the ear piece and I cannot discern any noticeable amount of noise reduction vs. the original ear pads.If you wear your ear pro for hours on end, you may be justified upgrading with the comfort of the Noisefighters. My range time is more limited. My son’s inexpensive, yet very effective, Walker ear pro is very comfortable right out of the box and that is what I will go to… Read more »
I have used Peltor Worktunes (3M) for over 15 years in the construction industry (self-employed finish carpenter) and while using power tools around the house. I noticed from the beginning, some of my tools produced a very high pitch whine, making it’s way through my Worktunes and affecting my hearing. It wasn’t until I installed a brutal stereo and speaker system in my van, while adding a sound deadening material inside my doors. It was Dynamat. sound deadening material.It worked so well it not only improved the clarity of the stereo, but reduced road noise also. With pieces I had… Read more »
I have both the universal NoiseFighters and the Walkers Razor version and after using them I will never own or use another pair of ear-pro that isn’t NoiseFighter equipped. They are hands down the most comfortable and most effective thing you can add to your ear-pro, be they electronic or just passive muffs. Neal, the owner, has been the most upstanding and pleasureful person to deal with in any retail industry, be it gun related or not! I cannot recommend or praise the company highly enough! He also has another company, Sintercore, which, ironically, is how I came across NoiseFighters… Read more »
This is good info! Thanks! I searched for the hishest NRR rated electronic ear protectors. The highest found where 33. I had been having to wear plugs with muffs over them at the range. At 33, there is much better protection w/o extra plugs. They are expensive, but not as expensive as hearing loss. I bought them for a discounted price online from DVOR, called “Pro Ears”They are bulky but wonderful! Now I have no discomfort at the range!!
I found replacement cups on Amazon for about $10 that seem to be superior to the originals.
I’ll have to try the DIY improvements as I’ve always been a bit disappointed in how the muffs seal and their noise reduction isn’t the greatest. I still like them, but they indeed could be improved.
I’ve also used crumpled up paper towel in the hollows of some older electronic muffs. Noticeable improvement! Over the years, I’ve purchased several pair, chasing that “perfect” pair. As a result, I now have several “improved” muffs for my guests and first time shooters that I take out as often as possible.
Great article!